
This
tutorial was created with Photoshop CS6 or CS2
depending on what filters I use. Some older
filters will no longer work in CS6. Can be done with other
versions and/or programs.
Supplies:
Artist's
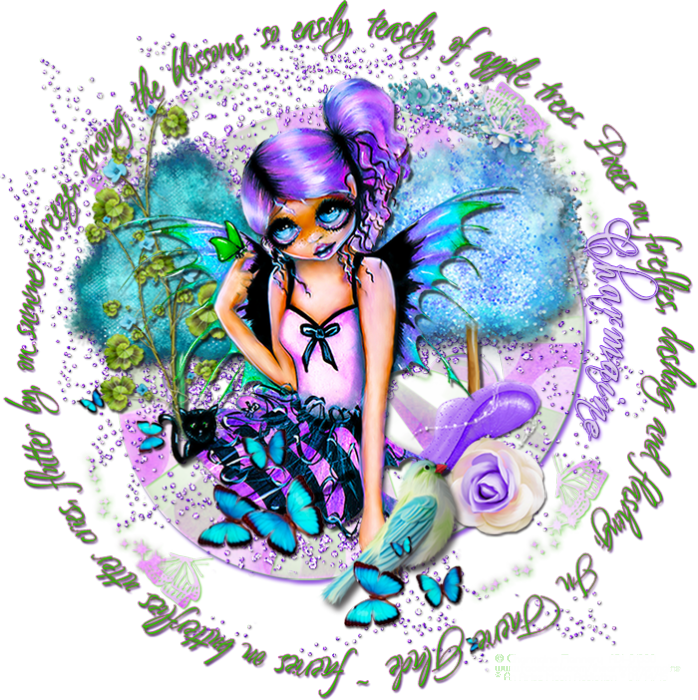
Tube of choice: I am using the
lovely Aimee, PTU work of Charmaine Flannery. Please DO NOT use her
images without the proper license or permission. You can find this
tube here

Scrap
Kit of choice: I am using the
gorgeous PTU kit Fairy Dust by Tiny Turtle Designs. You can find this
kit here

Mask
of choice: I am using a mask
that I made. ARZMN_Mask%06. and you can grab it by clicking on it to
bring it to full size then save the image. Or mask of choice.

A
Poem or part of one and/or a quote: The
one I used is named In Faerie Glade and was written by John Bliven
Morin. It can be found HERE
Fonts
of choice: I am using FFF
Harmony for the ©, Eutimia I for the name, and ALS Script for the
poem.
You
will also need my preset shape PNG file if you are using Paint Shop
Pro

or
If
using Photoshop, the actual shape file, which you can download here
Ok,
grab a cuppa, and a munchie, and let's go!!
Please
remember to SAVE your work often, RENAME
your layers, and if you feel you have really messed up.... Remember
that UNDO is your bestest friend!!
Abbreviations
C/P
= Drag and Drop OR Edit>Select All>Edit>Copy>Edit>Paste
DS
= Drop Shadow
MV
– Merge Visable
Create
a new image 800 x 800 , transparent background, 72dpi/ppi. Name the
file whatever you wish and hit ok.
C/P
or apply the preset shape to the center of the canvas. Photoshop
users, make sure your fill is set to white, or what ever color you
wish to use and the stroke is set to null.
Prepare
and apply the mask to the center of the canvas. C/P paper fairy dust
(13) or whatever paper you wish to use, above your mask and create
clipping mask. Duplicate the paper and with your burn tool darken up
parts of the paper. The importance of using the shape under the mask
is 1) The colors are so light that to actually see anything you would
have to apply the mask twice. 2) Further down in the tut you will be
adding some shadows that will give further depth to the image.
C/P
fairy dust (83) to the upper right of the mask, and drag the layer
under the mask layer, in the layer palette. With your eraser on a
soft setting erase the part of the element that hangs inside the
mask.
C/P
fairy dust (5). Duplicate, and position each layer where you would
like it to go. Erase parts of the glitter that fall on the hearts of
the mask.
C/P
fairy dust (80) and (108). Place one on each side of the mask and if
needed erase a little of the trunks until they reach just the inside
of the mask.
C/P
your tube. Resize it down to what ever you desire. Place Aimee to the
center and a little to the left, on top of the mask. Carefully erase
around her knees so that it looks as if she is sitting inside of it.
I left part of the cat too. Also carefully erase near her arms so
more of the hearts show from the mask. See my tag above for
reference.
C/P
fairy dust (24), (22), and (114) Resize down and position to the
right of Aimee and on top of the bottom of the tree.
C/P
fairy dust (101) and place at the bottom half of Aimee.
Add
any other elements that you wish to add.
Now
lets brighten up some of the colors on our tube and butterflies.
Click
on your tube layer to make Aimee active. Go to
Image>Adjustments>Vibrance and play with the settings until you
are happy with them. Do the same with the butterflies and other
elements.
Add DS of choice to all elements except for your shape, mask and
purple glitter.
Add
the following DS to your SHAPE
Add
the following DS to your MASK.

Select
all layers in your layers palette. Do this by clicking on the top
layer then hold your shift key and click on the last layer. Go to
Edit>Transform>Scale. Reduce your image a bit. You want enough
room to where you can fit a good size text around your image, without
the text getting cut out of the canvas. Don't forget to hit the
checkmark to apply the transformation.
Use the Sharpen>Unsharp Mask filter to sharpen your purple glitter. Then apply Noise at 15 gaussian. Add a slight DS.
Use the Sharpen>Unsharp Mask filter to sharpen your purple glitter. Then apply Noise at 15 gaussian. Add a slight DS.
Click
on the very top layer in the layer palette. Select your Ellipse Tool
with the following settings

Place
your cursor near the center of the canvas, click and drag your mouse
down and to the right until your circle goes completely around your
image. Don't worry if it is off center, we will fix that now. In your
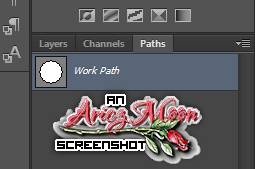
layers palette, click the Paths tab. If you do not see it in your
layers palette go to Window>Paths.

Click
where it says Work Path, then right click on the actual path on your
canvas and choose Free Transform Path. Click on your Move Tool and
move your path to where you would like it.


Click
back onto the layers tab. Choose your Text Tool. Select your font and
font settings. Choose Center for your text alignment. Smooth for your
anti-aliasing. Hover your cursor over your path until you see that
the cursor has changed.
From
this

to this

Click
once then start typing your text from the poem. Add any layer styles
that you wish to add to your text. Click on the Paths Tab one more
time. Right click on the path and choose Delete Path. Click back on
the layers tab.
Trim
the empty space around your tag and resize it to 700 x 700. Place
your name and © info. Save for Web as PNG-24
Oh
lala, you are done!!
This
tutorial was created by me, Mary Oakes aka Ariez Moon, on 01/14/2015.
Any similarity to any other tutorial is purely coincidental. Please
abide by my TOU and the TOU of Artists and Designers that you may
use.
I
hope you all enjoyed this tutorial, and I hope that I did not do too
bad of a job writing it. If you have any problems, questions,
comments, or suggestions just give me a hollar in my Cbox, or connect
with me on FB. I will get back to you as fast as I can.
As
always, Happy PSPing.... and Photoshop too :) !!

No comments:
Post a Comment