
This
tutorial was created with Photoshop CS6 or CS2
depending on what filters I use. Some older
filters will no longer work in CS6. Can be done with other
versions and/or programs.
Supplies:
Artist's
Tube of choice: I am using the
gorgeous PTU tube Faith by Misticheskaya. Please DO NOT use her
images without the proper license or permission. You can find this
tube here

Scrap
Kit of choice: I am using the
wonderful PTU kit Fall Sparkle by Tiny Turtle Designs. You can find
this kit here

Mask(s)
of Choice. I am using Forum Mask 5 by Moonbeams and Spiderwebs, and
you can find them here
Fonts
of choice: I am using Grixel
Acme 7 Wide for the © and Always Black for the name/text.
Ok,
grab a cuppa, and a munchie, and let's go!!
Please
remember to SAVE your work often, RENAME
your layers, and if you feel you have really messed up.... Remember
that UNDO is your bestest friend!!
Abbreviations
C/P
= Drag and Drop OR Edit>Select All>Edit>Copy>Edit>Paste
DS
= Drop Shadow
MV/MD
– Merge Visible/Merge Down
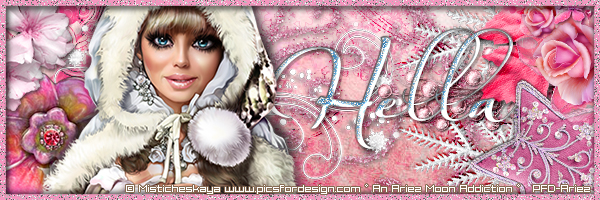
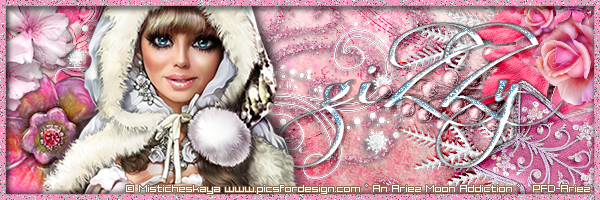
The
Tag:
Create
a new image 600 x 200 , transparent background, 72dpi/ppi. Name the
file whatever you wish and hit ok..
Prepare
your mask, and drag it to the center of your working canvas. If you
are unsure how to prepare your mask, please go HERE
for a short tutorial.
C/P
FS (48) above your mask layer. Place your cursor between the paper
and the mask layers thumbnail, hold down ALT and click to make a
clipping mask. This will “clip” your paper to your mask. MD
C/P
FS (37) above your merged mask layer, and set the layers Blending
Mode to Multiply.
C/P
FS (01) above the paper layer. Duplicate. On the bottom duplicate
right click on the layer and choose Blending Options. Click on DS and
give it a very small light shadow of your choice. Click on Inner Glow
and give it a small glow. Close all but those two layers in the
layer's palette, and MV.
C/P
FS (64). Duplicate. Give the bottom layer an Outer Glow. Close all
layers but those two layers and MV.
C/P
FS (70). Resize and position in the upper left corner. Rotate it a
bit, if you would like.
C/P
FS (96). Resize and place in the lower left corner.
C/P
FS (78). Resize and rotate to the left so the nub of the twig is
sitting snugly in the upper right corner. Duplicate. Go to Edit>Free
Transform>Flip Vertical and position in the lower right corner.
C/P
FS (33). Resize and rotate so that it sits horizontally. Position
center right of the tag.
C/P
FS (44). Reduce the size and rotate so the stem faces the upper right
corner of the tag. Position to your liking.
C/P
FS (60). Resize and position on top of the leaf.
C/P
(124). Resize and rotate. Position to your liking on the lower right
corner of the tag.
C/P
your tube. Resize down to your liking and position center left of the
tag.
Take
one last look at your tag. Reposition elements and/or add anything
else you wish to add. Ad DS(s) and/or glows to any or all layers,
that you wish to add.
Create
a new layer Select>All>Select>Modify>Border. Type in the
amount of pixels you would like your border to be. Mine was 15.
Choose a color that matches your image and click inside the selection
a couple of times to make it nice and solid. Add a layer style of
choice.
Add
your © info and your name with any layer styles you wish to you use.
Save
for Web as JPEG or PNG, DO NOT close your image just yet. We will
need it in a just a sec.
The
AV:
Create
a new 150 x 150 image. Transparent background. 72 DPI, name the file
whatever you wish.
Back
on your main image. Click on the rectangle Tool. In your settings set
the Tool Mode to Path. Click on the little gear icon located at the
end of the Tool Settings. Tick the Square option. Click once
somewhere on the background of your tag, that you would wish to use
for the background of your AV. A pop up should appear. Enter the
dimension of 150 in both the width and the height and tick From
Center.
Click
on the Paths tab, just above your Layers Palette. Right click on the
Work Path and choose Make Selection. When that pop up shows, make
sure Feather Selection is to 0.
If
it isn't exactly where you want it, that is ok. We are going to fix
that now.
Go
to Select>Edit In Quick Mask Mode OR click on the Quick Mask
button on your Tool Bar. Except your selection everything around it
should be covered in red.
With
your Move Tool or your arrow keys on your keyboard, nudge your square
exactly as you like it.
Select>Edit
In Q. M. Mode OR the button once more, and it should now be back to a
regular selection.
Edit>Copy
Merged
On
your AV canvas now, go to Edit>Paste.
Create
a new layer, in the the same steps as your main image, create your
border.
Type
your initial with the same layer styles as you did your name, and if
your AV has the tube on, place © info. Save as JPEG or PNG and you
are finished!!
OOOO
O-o..... Very Pretty!!
This
tutorial was created by me, Mary Oakes aka Ariez Moon, on 01/20/2015.
Any similarity to any other tutorial is purely coincidental. Please
abide by my TOU and the TOU of Artists and Designers that you may
use.
I
hope you all enjoyed this tutorial, and I hope that I did not do too
bad of a job writing it. If you have any problems, questions,
comments, or suggestions just give me a hollar in my Cbox, or connect
with me on FB. I will get back to you as fast as I can.
As
always, Happy PSPing.... and Photoshop too :) !!

No comments:
Post a Comment